一、调试搭建
🔺Windows版本
1.前置安装
phpstorm+phpStudy
这两个需要先装好,之后利用phpStudy中自带的xdebug来调试
2.phpStudy设置
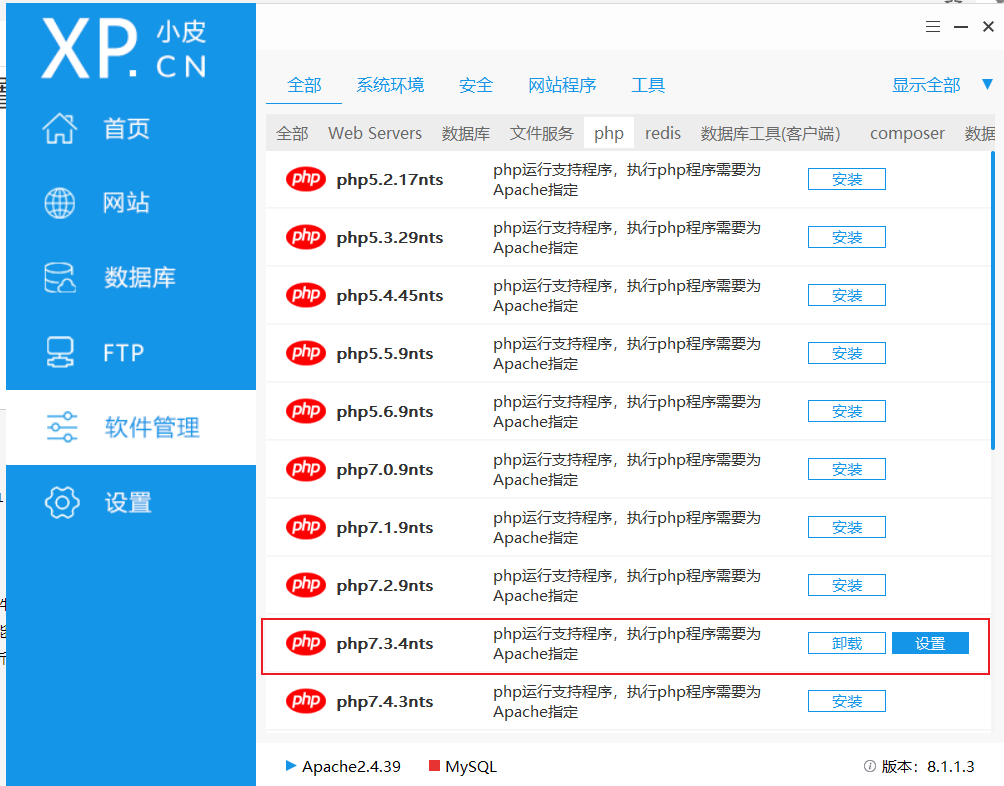
(1)php版本
这里我的php选择的是如下
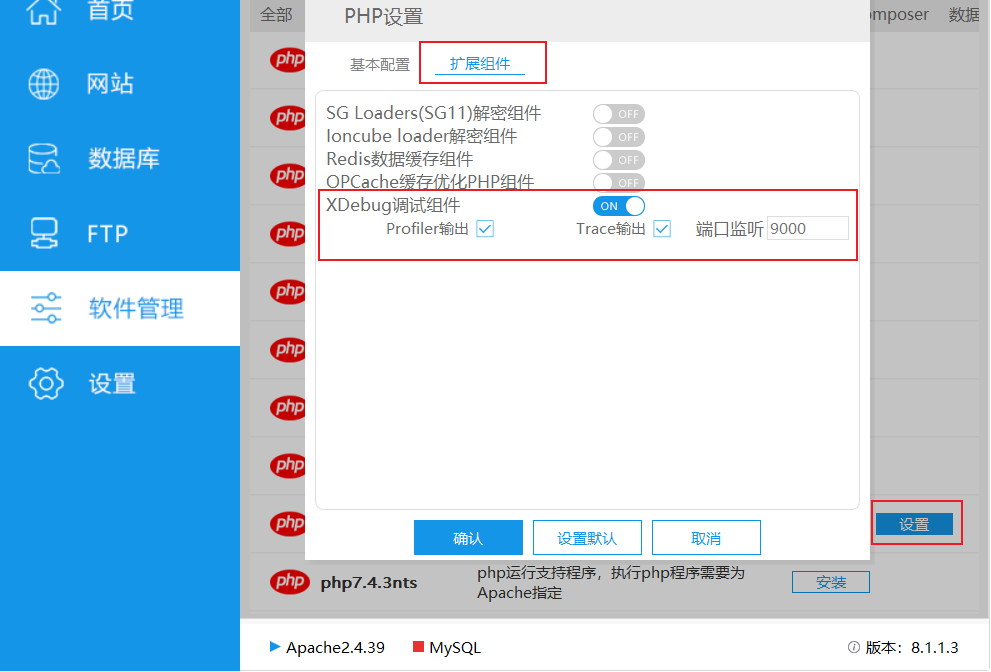
(2)打开xdebug
单击设置->扩展组件,设置如下
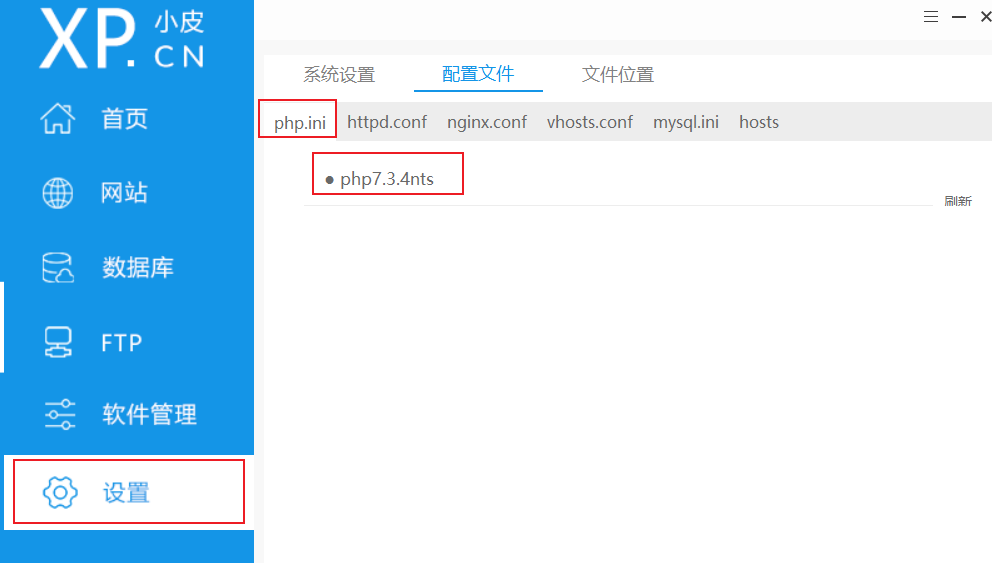
(3)修改php.ini
然后主界面设置->php.ini->单击对应版本,即可打开php.ini配置文件
打开之后,在最下面的xdebug设置如下
1
2
3
4
5
6
7
8
9
10
11
12
13
| [Xdebug]
xdebug.idekey = PHPSTORM
zend_extension=D:/phpstudy_pro/Extensions/php/php7.3.4nts/ext/php_xdebug.dll
xdebug.collect_params=1
xdebug.collect_return=1
xdebug.auto_trace=On
xdebug.trace_output_dir=D:/phpstudy_pro/Extensions/php_log/php7.3.4nts.xdebug.trace
xdebug.profiler_enable=On
xdebug.profiler_output_dir=D:/phpstudy_pro/Extensions/php_log/php7.3.4nts.xdebug.profiler
xdebug.remote_enable=On
xdebug.remote_host=localhost
xdebug.remote_port=9000
xdebug.remote_handler=dbgp
|
这里参考https://www.cnblogs.com/baocheng/p/5775938.html 相关的会更加详细。
主要是设置xdebug.remote_handler,xdebug.remote_port,xdebug.remote_host,xdebug.profiler_enable,xdebug.idekey,xdebug.remote_enable
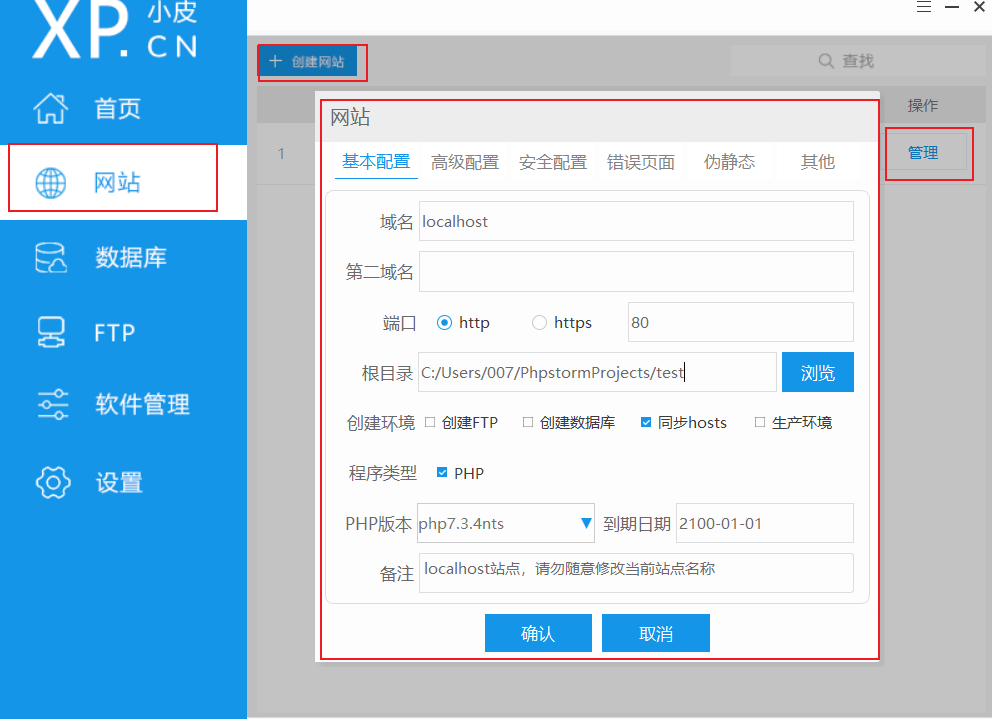
(4)网站路径设置
主界面网站->管理->修改->根目录,然后设置为在phpStorm中存放php文件的目录,没有的可以直接创建一个
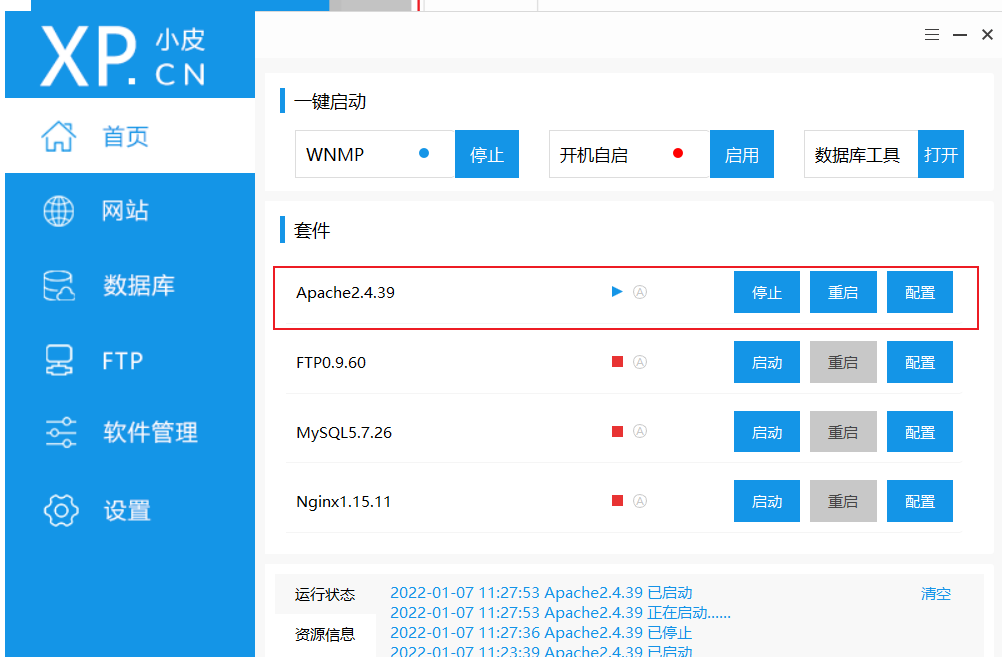
(5)开启服务
phpStudy中开启对应的网站服务即可
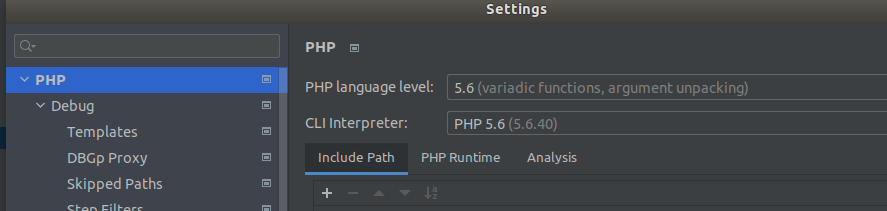
3.phpstorm设置
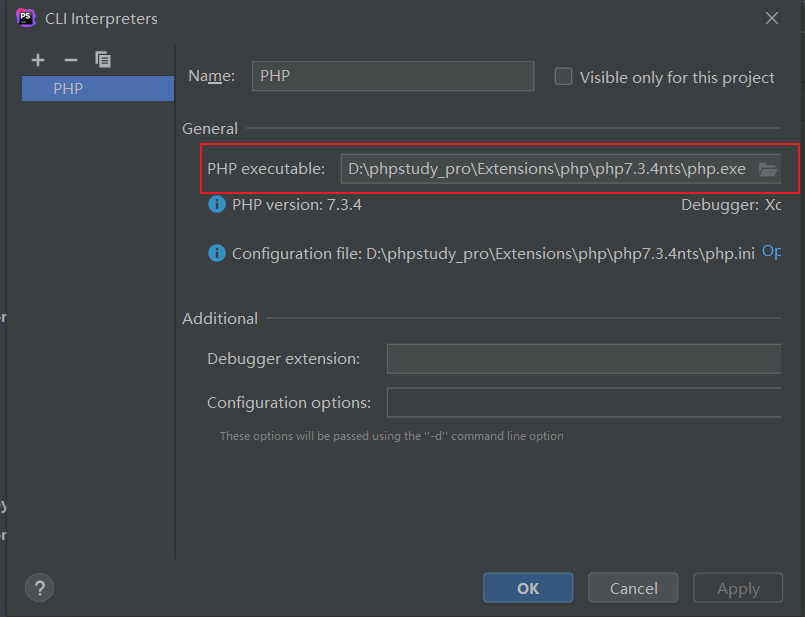
(1)PHP版本选择
版本选择之前我们的设置好的相关版本

这里的CLI interpreter需要选择phpStudy中的php,点击旁边的...按钮,找到对应的php.exe添加即可,大多的路径如下
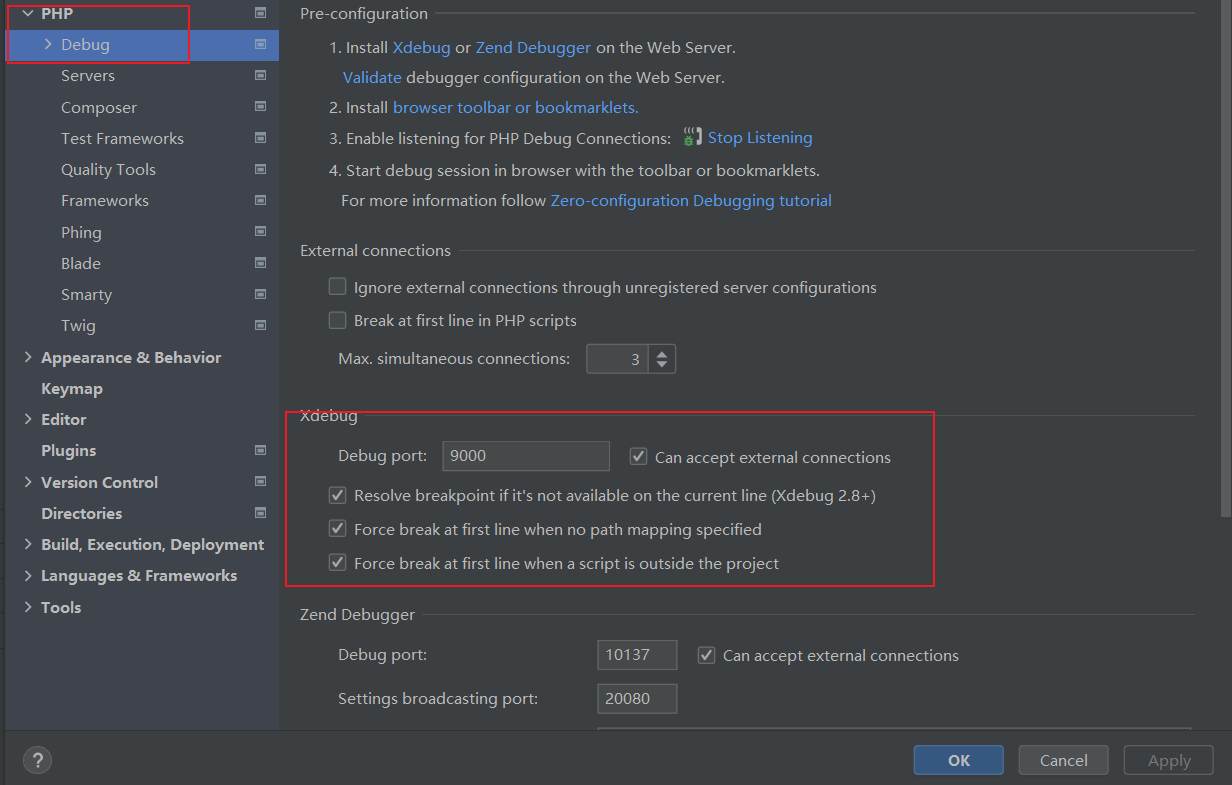
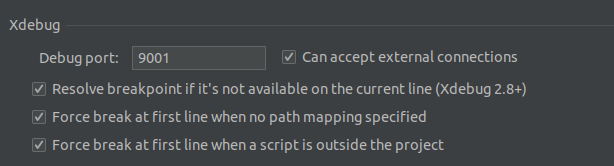
(2)xdebug配置
打开phpstorm,打开setting->PHP->Debug,xdebug配置如下,主要是端口对应
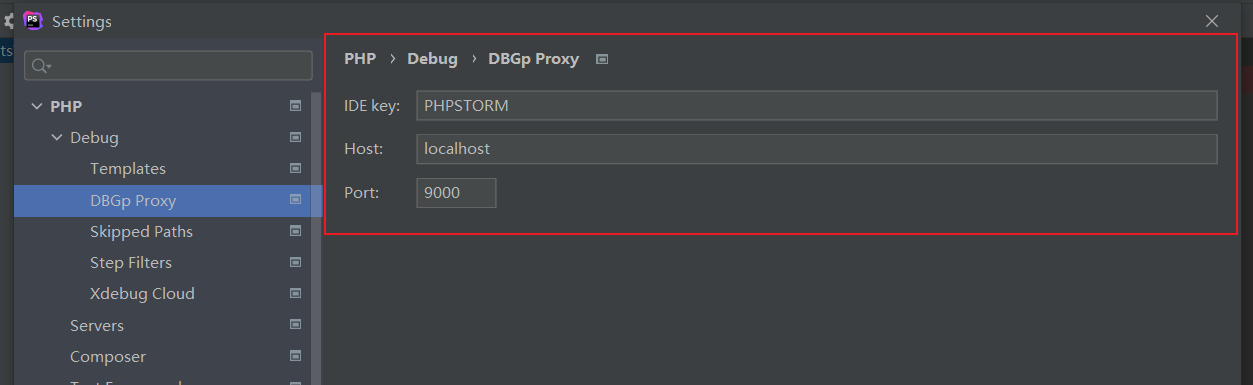
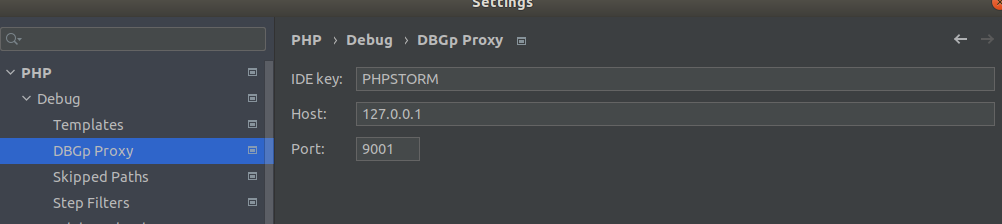
PHP->Debug->DBGp Proxy,进行相关设置
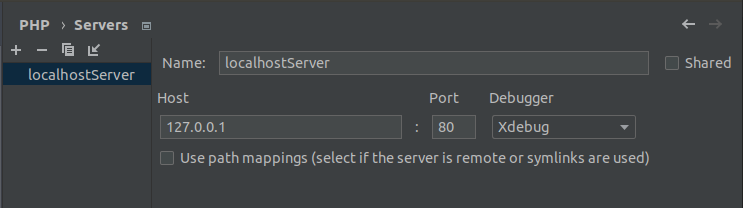
(3)服务器端配置
setting->server
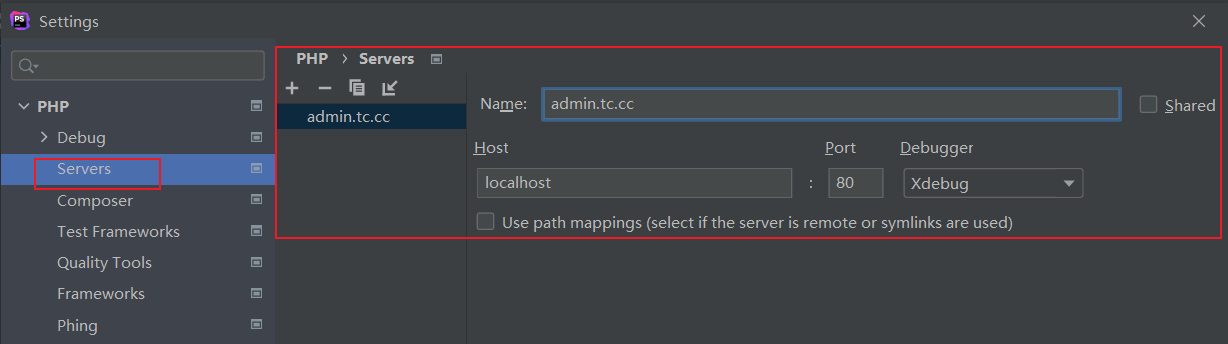
没有的自行+号添加,名字自己定义
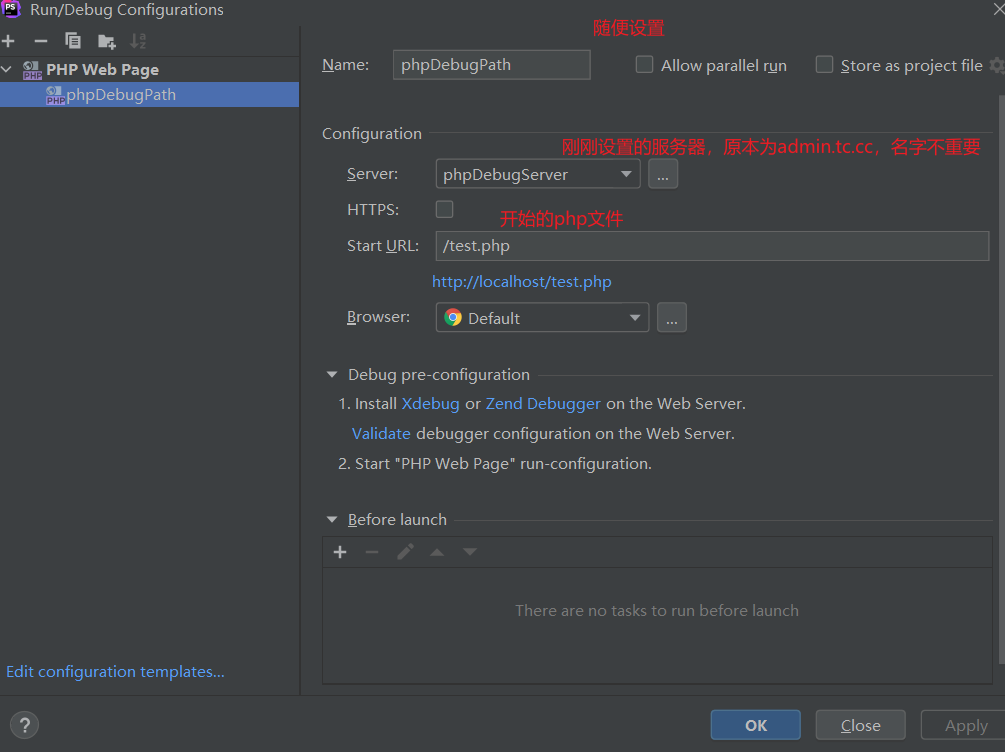
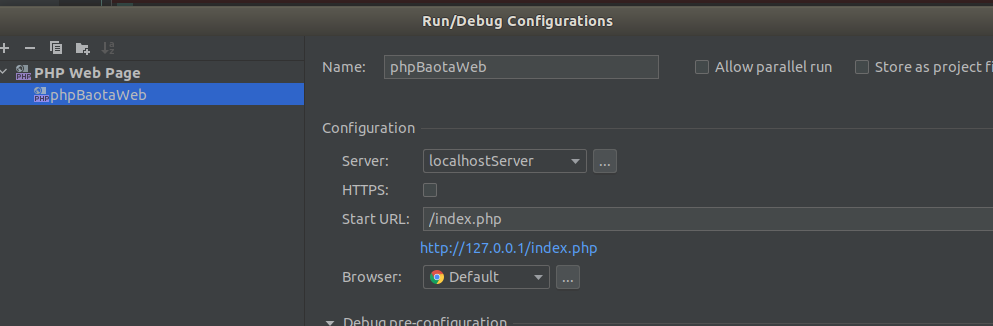
(4)配置php文件路径
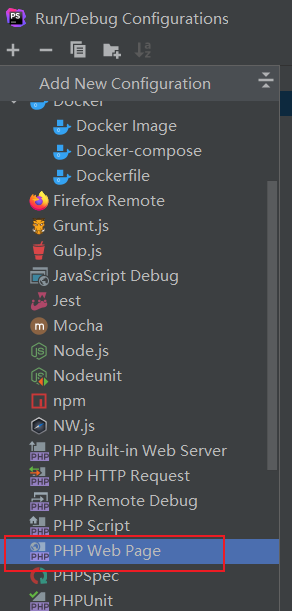
Run->Edit Configurations

然后添加对应的调试路径
对应设置
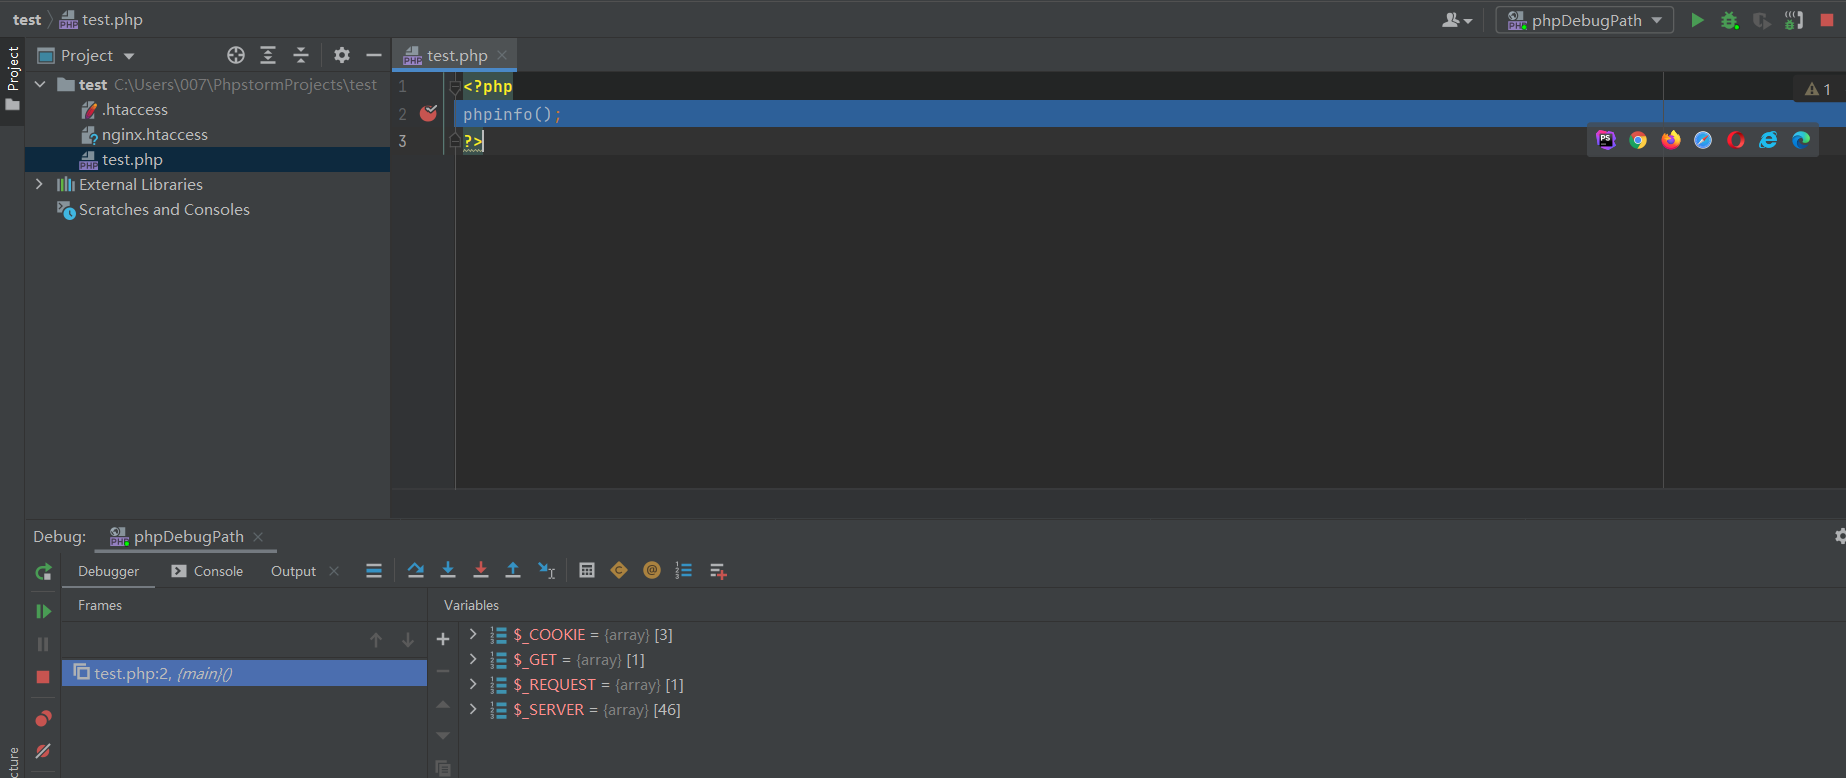
4.开始调试
然后在phpStorm中对应网站的目录下的文件即可下断点开始调试
(1)开始监听

设置好调试环境,然后点旁边的电话,使其变成如下

(2)调试
在文件中下断点,点击debug即可开始调试
🔺Linux版本
1.前置安装
用的也是PHPSTORM和宝塔linux
2.宝塔linux设置
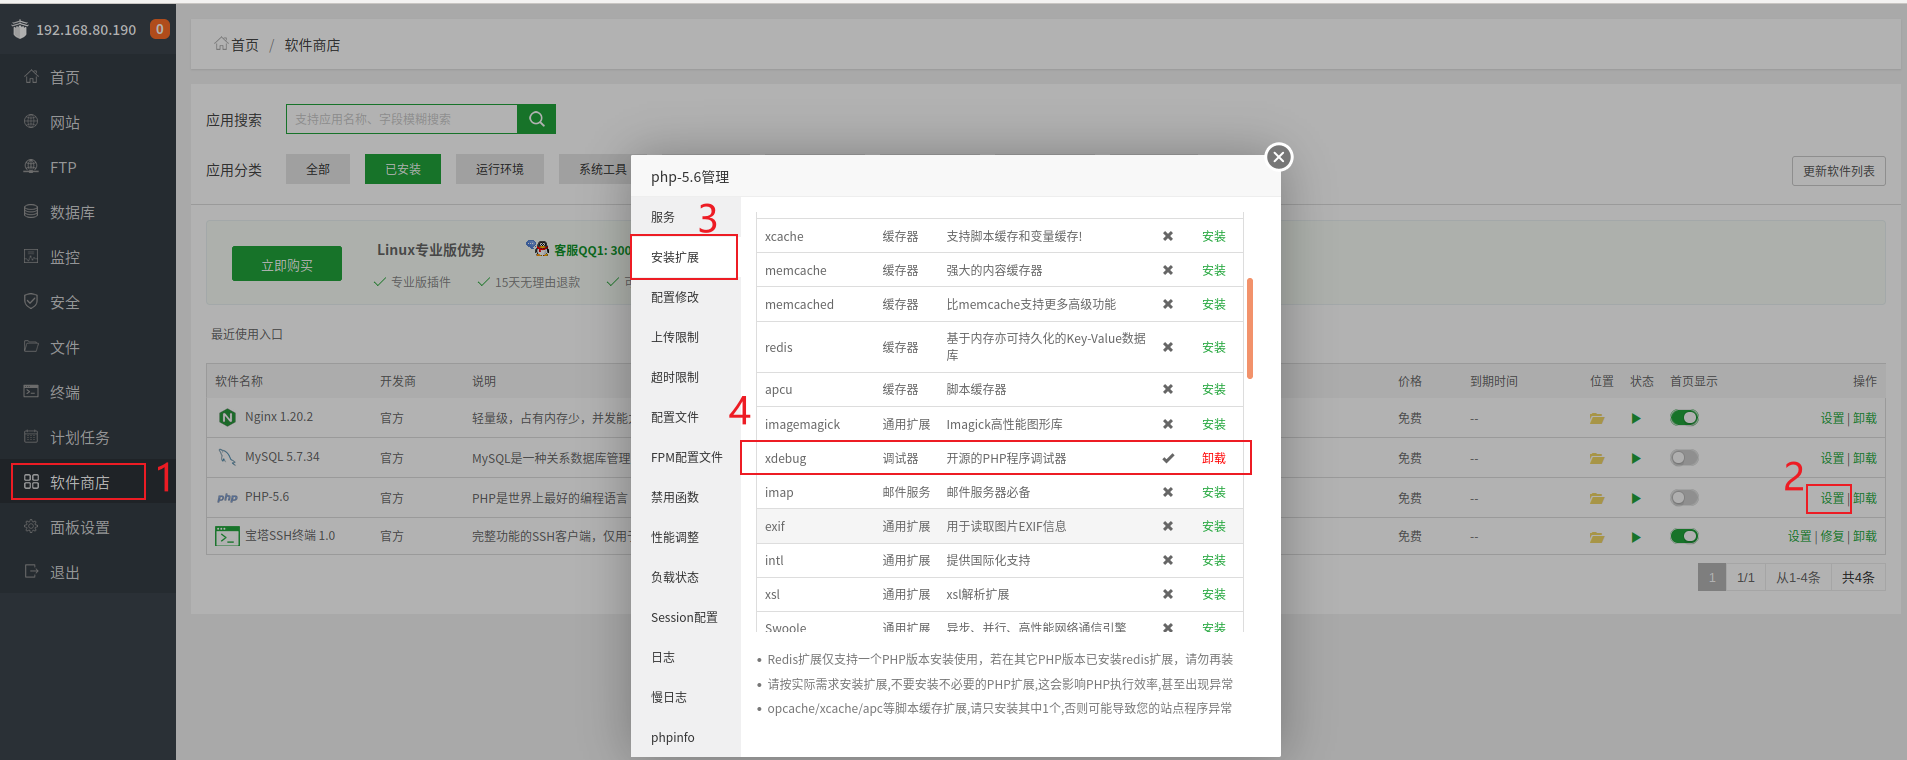
(1)安装xdebug
安装好PHP之后,设置安装PHP的拓展
(2)配置php.ini

1
2
3
4
5
6
7
8
9
10
11
12
13
14
15
16
17
| [XDebug]
; 允许远程 可以为 On 或者 1 都表示启用 , Off 和 0 表示关闭关闭
xdebug.remote_enable = On
; 远程主机的 IP 这里我们填写,固定的 127.0.0.1 这里写的是PHPSTORM所在的那台机器上的IP
xdebug.remote_host = 127.0.0.1
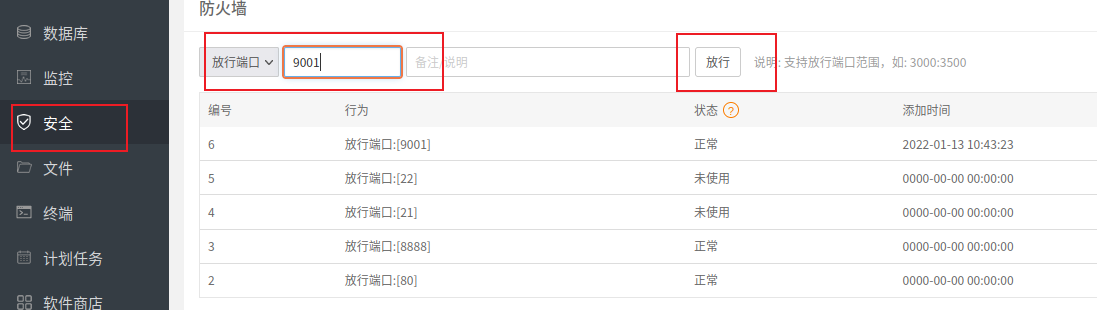
; 调试连接端口 请记住这个端口,后续会用到。此配置项默认值为 9000 ,但是通常 9000 端口被 fpm 占据 ,故更换端口。
; 另外,请在你服务器的控制面板和服务器防火墙中开放这个端口的进出站。
; 如果你是宝塔面板用户 请放行此端口。
xdebug.remote_port = 9001
; 接下来的值都是可选的,但是我推荐你使用
; 连接 IDE 的 Key,请记住他,可以自己自定义,主要用来过滤请求。
xdebug.idekey=PHPSTORM
xdebug.remote_handler=dbgp
xdebug.collect_params=1
xdebug.collect_return=1
xdebug.auto_trace=On
xdebug.profiler_enable=On
|
参照
Linux内网服务器+宝塔+Xdebug远程调试配置 – T1h2ua’s Blog
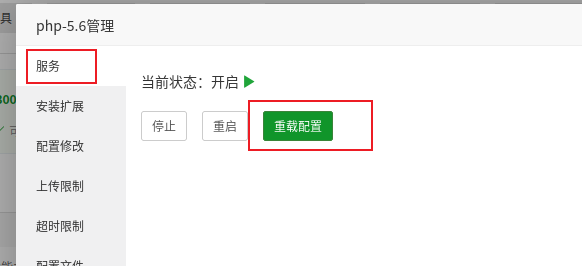
保存之后,重载一下配置
(3)网站路径设置
宝塔Linux中点击网站,添加站点
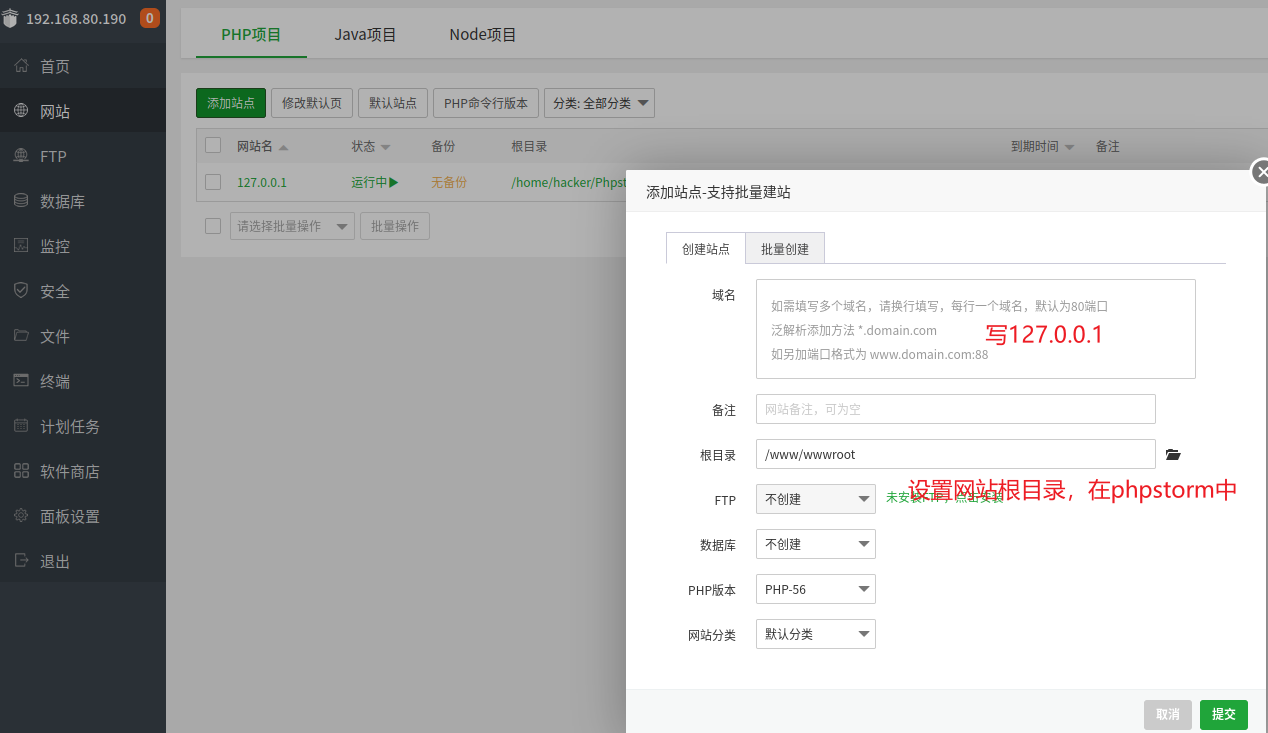
得到如下

(4)开启服务
记得把对应的服务打开,nginx/apache和php

(5)放行9001端口
3.phpStorm设置
这里就都差不多,选择php版本,配置xdebug,配置Server,配置php文件路径,注意这里选取的端口为9001
然后就可以调试了。
🔺注:
xdebug3.0以上的,配置有点变化,如下
1
2
3
4
5
6
7
8
9
10
11
| [XDebug]
xdebug.mode = develop,debug
xdebug.start_with_request = default|default
;xdebug.start_with_request = yes ;当改为yes时所有请求都会走debug,不需要设置idekey
xdebug.client_host = 127.0.0.1
xdebug.client_port = 9001
xdebug.remote_handler = dbgp
xdebug.idekey = PHPSTORM
xdebug.cli_color = 2
xdebug.var_display_max_depth = 15
xdebug.var_display_max_data = 2048
|
二、数据库搭建
1.phpStudy设置
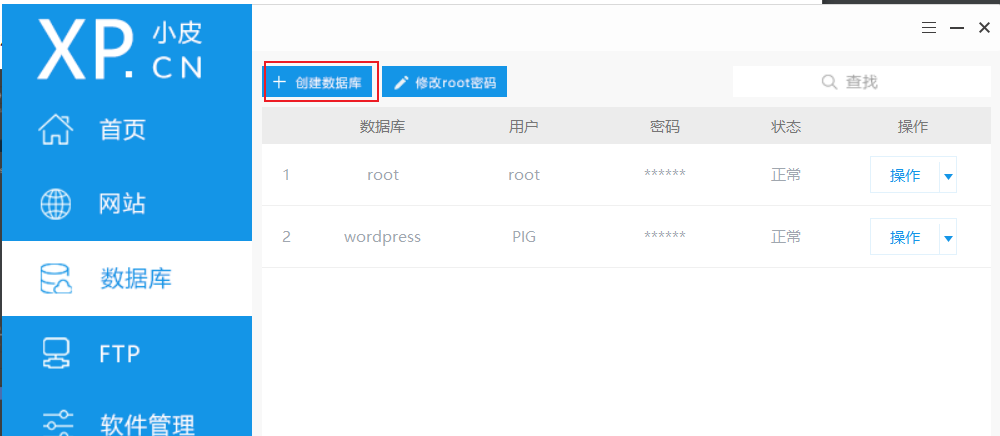
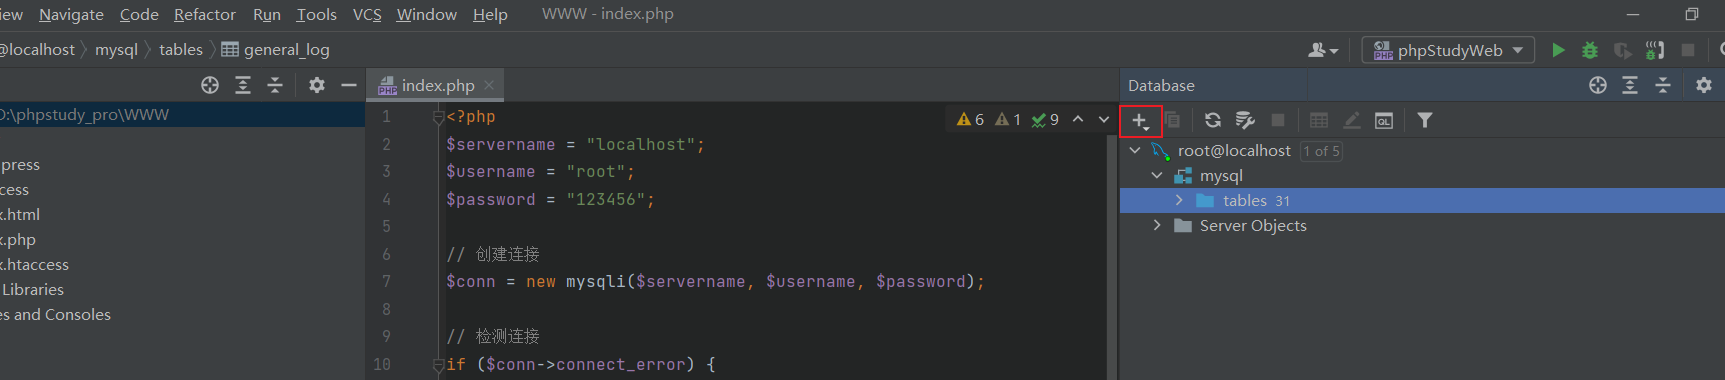
(1)创建数据库
设置数据库,没有就创建,鼠标碰到密码可以查看
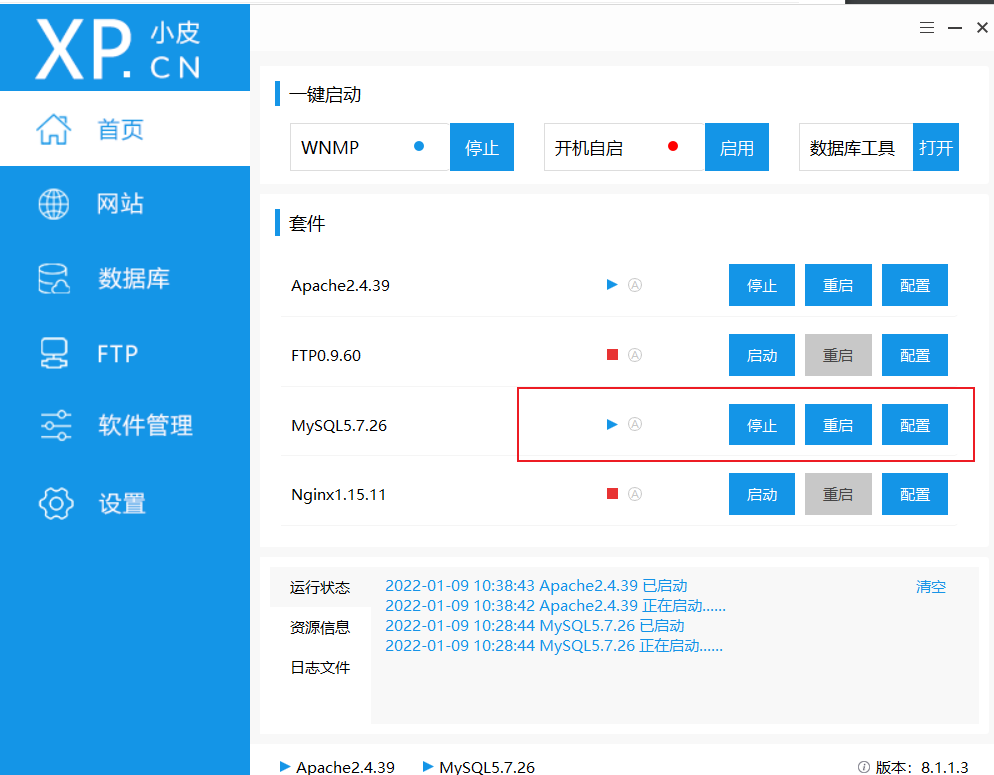
(2)打开MySQL数据库
2.phpStorm设置
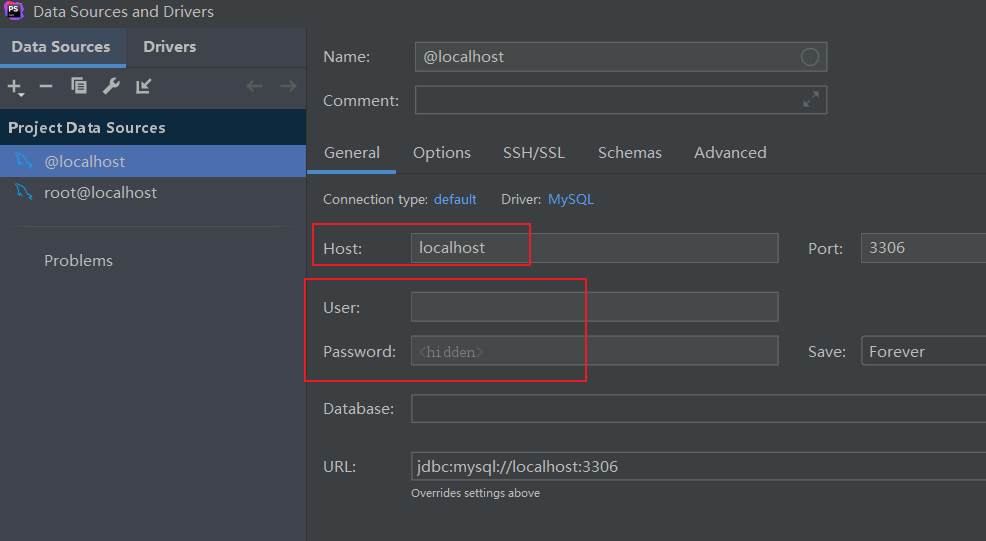
(1)设置
view->Tool Windows->databases
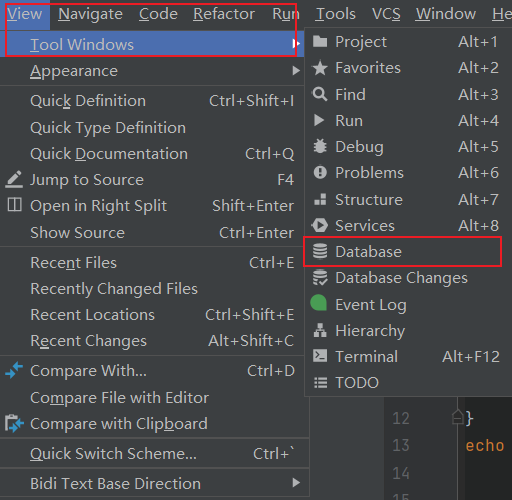
然后创建一个连接

对应输入host,账号密码即可
(2)查看控制
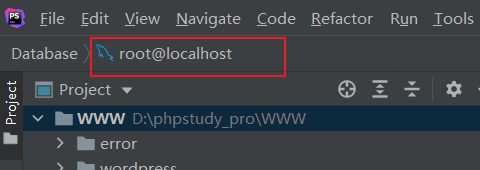
view->tool windows->database之后,双击上面红框可以进入控制界面
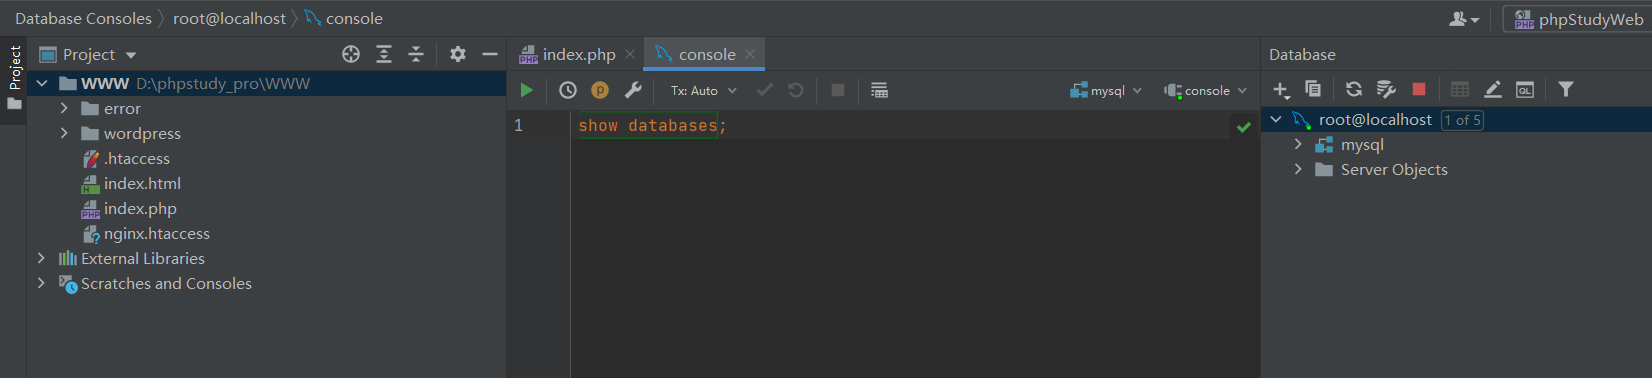
然后就正常了。
三、PHP模块搭建
1.创建模块模板
找到php源码目录
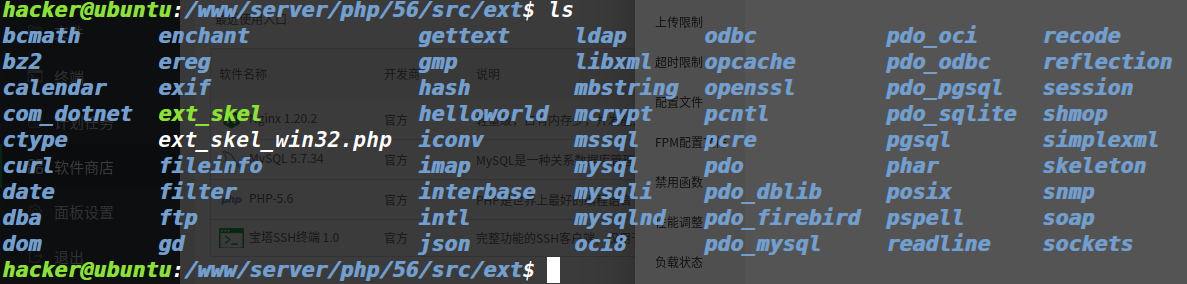
然后使用ext_skel创建一个模板
1
| ./ext_skel --extname=helloworld
|
2.编译模块
随后进行编译,跳转到刚刚生成的模块文件夹路径/path_to_php_src/ext/helloworld,然后编译
1
2
| /www/server/php/56/bin/phpize
./configure --with-php-config=/www/server/php/56/bin/php-config
|
这里需要指定一下--with-php-config,选择自己的php-config,当然如果本地的环境变量bin命令下直接有php-config也不用指定了,随后
这样就可以在当前目录下生成了

其中helloworld.c即为创建的模板代码,但是不知道为什么5.6版本的编译完成后,不生成.so模块文件,可能是版本特性?
1
2
3
4
5
6
7
8
9
10
11
12
13
14
15
16
17
18
19
20
21
22
23
24
25
26
27
28
29
30
31
32
33
34
35
36
37
38
39
40
41
42
43
44
45
46
47
48
49
50
51
52
53
54
55
56
57
58
59
60
61
62
63
64
65
66
67
68
69
70
71
72
73
74
75
76
77
78
79
80
81
82
83
84
85
86
87
88
89
90
91
92
93
94
95
96
97
98
99
100
101
102
103
104
105
106
107
108
109
110
|
#ifdef HAVE_CONFIG_H
# include "config.h"
#endif
#include "php.h"
#include "ext/standard/info.h"
#include "php_helloword.h"
#ifndef ZEND_PARSE_PARAMETERS_NONE
#define ZEND_PARSE_PARAMETERS_NONE() \
ZEND_PARSE_PARAMETERS_START(0, 0) \
ZEND_PARSE_PARAMETERS_END()
#endif
PHP_FUNCTION(helloword_test1)
{
ZEND_PARSE_PARAMETERS_NONE();
php_printf("The extension %s is loaded and working!\r\n", "helloword");
}
PHP_FUNCTION(helloword_test2)
{
char *var = "World";
size_t var_len = sizeof("World") - 1;
zend_string *retval;
ZEND_PARSE_PARAMETERS_START(0, 1)
Z_PARAM_OPTIONAL
Z_PARAM_STRING(var, var_len)
ZEND_PARSE_PARAMETERS_END();
retval = strpprintf(0, "Hello %s", var);
RETURN_STR(retval);
}
PHP_RINIT_FUNCTION(helloword)
{
#if defined(ZTS) && defined(COMPILE_DL_HELLOWORD)
ZEND_TSRMLS_CACHE_UPDATE();
#endif
return SUCCESS;
}
PHP_MINFO_FUNCTION(helloword)
{
php_info_print_table_start();
php_info_print_table_header(2, "helloword support", "enabled");
php_info_print_table_end();
}
ZEND_BEGIN_ARG_INFO(arginfo_helloword_test1, 0)
ZEND_END_ARG_INFO()
ZEND_BEGIN_ARG_INFO(arginfo_helloword_test2, 0)
ZEND_ARG_INFO(0, str)
ZEND_END_ARG_INFO()
static const zend_function_entry helloword_functions[] = {
PHP_FE(helloword_test1, arginfo_helloword_test1)
PHP_FE(helloword_test2, arginfo_helloword_test2)
PHP_FE_END
};
zend_module_entry helloword_module_entry = {
STANDARD_MODULE_HEADER,
"helloword",
helloword_functions,
NULL,
NULL,
PHP_RINIT(helloword),
NULL,
PHP_MINFO(helloword),
PHP_HELLOWORD_VERSION,
STANDARD_MODULE_PROPERTIES
};
#ifdef COMPILE_DL_HELLOWORD
# ifdef ZTS
ZEND_TSRMLS_CACHE_DEFINE()
# endif
ZEND_GET_MODULE(helloword)
#endif
|
🔺注:
需要注意的是,在php7.3以上,ext_skel这个shell变成了ext_skel.php,所以我们使用如下来创建
1
2
3
4
| /www/server/php/73/bin/php ./ext_skel.php --ext helloword
/www/server/php/73/bin/phpize
./configure --prefix=/www/server/php/73/bin/php --with-php-config=/www/server/php/73/bin/php-config
make
|
3.加载模块
方法一:
直接make install,然后在对应的php.ini中添加extension=helloword.so
方法二:
复制modules下的helloworld.so模块到对应的php扩展目录
1
| cp ./modules/helloword.so /www/server/php/73/lib/php/extensions/no-debug-non-zts-20180731/
|
同样也得在php.ini中添加extension
之后使用模板中函数测试即可
1
2
3
| <?php
helloword_test1();
?>
|
如下即可成功

这个php拓展模块其实跟linux内核有点像